Shinjuku, Wednesday, April 3rd, 2019

Shinjuku at night. Shinjuku is probably my favorite part of Tokyo..

1. Tokyo to Fukushima

Since we had time, and the JapanRail Pass at our disposal, the day started with a side trip to Fukushima. We intentionally left after the Tokyo morning commute, arriving at Tokyo Station after 0900. We boarded the Tohoku-Hokkaido Shinkansen bound for Fukushima station at 1000.

Shortly after leaving the Tokyo metro area, we were surrounded by rural Japan, interspersed with smaller towns along the way. Based on our speedometer apps, the bullet train topped out near 180 mph (300 kph). Visiting Fukushima aside, I simply enjoyed riding the train. The ride afforded us an opportunity to see parts of Japan we might otherwise miss.

The view from the train, traveling north toward Fukushima. The snow capped mountains in the distance reminded us that it was still winter in part of central Japan.

Sunshine in Tokyo was gradually replaced by clouds as we moved north. A cool start in Shinjuku turned into a winter’s day the further north we reached. The 93 minute trip felt like a trip back in time, as spring reverted to winter before our eyes. Not far outside of Fukushima, the sky became overcast, and the skies opened up. However, rather than a rain shower, we encountered a fairly vigorous snow shower.

Snow showers descending out of the mountains toward the train outside of Fukushima.

By the time we reached Fukushima, the sun was peeking out from behind the clouds. However, despite the weak early April sun, it was cold, with a stiff northwest wind making feel like mid January. We braved the cold to walk around the city. Fukushima, a city of a roughly 250,000, is about 10 miles from the exclusion zone following the earthquake and tsunami in 2011.

Despite arriving near midday, the city was curiously devoid of activity. Walking through central Fukushima, we encountered few people outside. Passing the local high school, we were greeted by some students, who insisted on high-fiving us as they passed. We’ve noticed in our travels that younger people will interact with us, while older Japanese tend to shy away.

Walking down the street from the station, we encountered an older Japanese woman. I fully expected her to walk by without even looking up, as we have seen in the past. However, as she approached us, her eyes brightened, smiled and warmly said “Good morning!” in English as she passed. I stopped in my tracks, as I was stunned. In the moment, I wondered when the last time she said good morning in English.

Domino’s in Fukushima. Not pictured here is the Denny’s just down the street. Almost reminds me of home. (Photo credit: Jeff Hayes)

While we didn’t see many people on this cold afternoon, we did find some reminders of home down the street from the station. Seeing the American franchises in Fukushima, I couldn’t help but wonder if we were exporting something that could change the way the Japanese eat.

After walking through the streets of Fukushima for more than an hour, we headed back toward the train station for the trip back to Shinjuku. On the lower level of the station, there were shops and places to eat. Instead of a meal, we opted to get something from the convenience store there, then headed upstairs to track level.

A display in the Fukushima train proudly announcing that baseball and softball will be played here in the 2020 Olympics. (Photo credit: Jeff Hayes)

On the track level, we discovered an impressive model train setup, as well as displaying touting the arrival of the world for baseball and softball with the Olympics in 2020. The Fukushima station was possibly the nicest train station we visited in Japan. Walking through the station to catch the train back to Tokyo, I couldn’t help but wonder if the quiet town of Fukushima was ready for what was coming in little more than a year.

2. Getting to the game in Shinjuku

Following the quick trip to Fukushima, we ate a late lunch and relaxed at the hotel before heading out to the game. Fortunately for us, our hotel was less than 3.5 kilometers from the park. Since there was not a clear path to walk there, we took the Chu-Sobu Line from Shinjuku Station to Meiji Jingu Station. The trip consisted of three stops, followed by a 1.1 kilometer walk from the Meiji Jingu Station to Mejij Jingu Stadium. After leaving the station, it was not clear how to get to the stadium. Once you leave the station, you need to cross UNDER the tracks and head up a gentle slope to reach the sidewalk on the other side.

Once you reach the top of the slope, you will see a stadium. When we were there in April of 2019, the stadium was under construction. This is NOT Meiji Jingu Stadium; it is a stadium for hosting events for the Olympics. You need to walk beyond this stadium, cross the street and walk a couple of blocks to arrive at Meiji Jingu Stadium. We managed the walk and search for the stadium with relative ease. However, if you are traveling with someone who has difficulty getting around, you may want to consider hailing a taxi at the train station.

On a side note, the entrance to Meiji Jingu Shrine is across the street from the sports complex. It is a picturesque park with the shrine in the middle. This is not a place to visit just before a game; the shrine grounds are too sprawling to attempt to cover shortly before a game. Instead, if your schedule allows it, visit the shrine when you have a couple of hours to devote to it.

Meiji Jingu Shrine in Shinjuku. The sprawling complex has several central buildings, as well as trails for hiking. (Photo credit: Jeff Hayes)

3. Meiji Jingu Stadium

Like many NPB ballparks, the official team store for the Tokyo Yakult Swallows is not at the stadium. Actually, it about 250 meters BEFORE the stadium on the left hand side of the street. If you have trouble finding it, just follow the crowd. The store is VERY popular, and we suggest leaving some time to browse before heading to the park. Inside the store, we found the standard fare, with a good selection of apparel. My brother scored a colorful Swallows jersey, while I opted for a cap and yearbook (which is, of course, in Japanese). Don’t worry about taking your team store bags into the stadium; unlike MLB parks, the NPB parks are more lax when it comes to bringing bags into the stadium. You will, however, have to open your bag for security before entering the ballpark.

Following the mini shopping spree, we headed for the stadium just up the road. There was not much to see outside, so after a cursory look, we entered the ballpark. We were able to discern the gate through which we were supposed to enter, but after that we had to hand our tickets to stadium staff to help us to our seats.

The view from our seats in Meiji Jingu Stadium. Unlike most of the NPB games we’ve seen, this one was lightly attended. Perhaps the fact that the game time temperature for the 1800 start was about 5 Celisus (about 41 degrees Farenheit) had something to do with the small crowd. (Photo credit: Jeff Hayes)

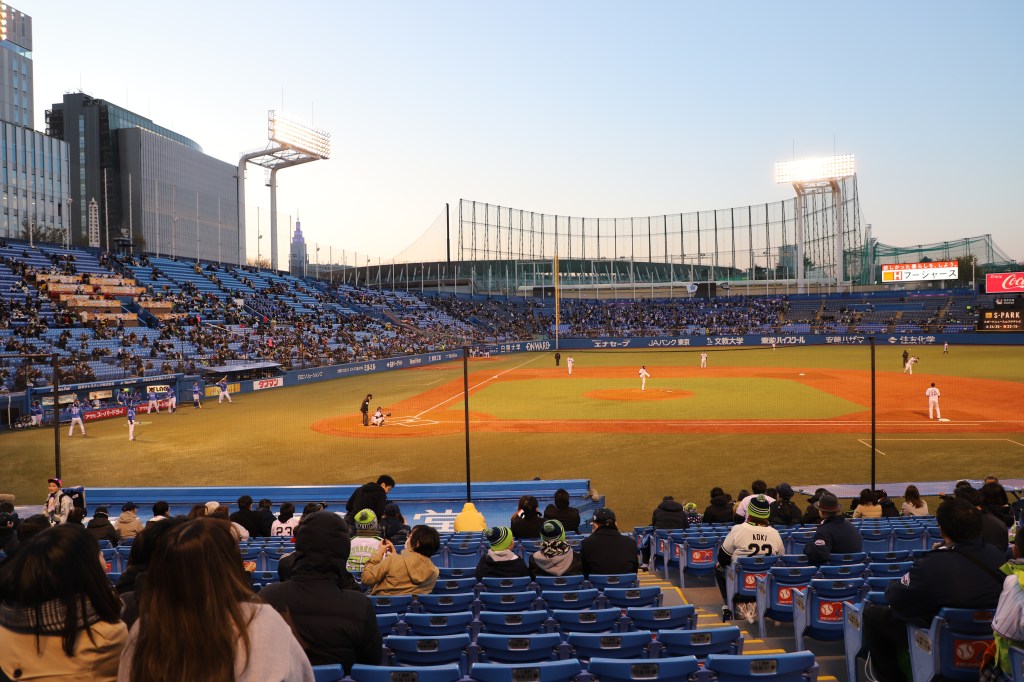
From the moment we decided to come to Japan to see baseball games, Meiji Jingu Stadium was on our radar. This ballpark is hallowed ground. Beside being the second oldest ballpark in Japan (having opened in 1926), it is one of four major league stadiums in which Babe Ruth played that are still in use (the others being Koshen Stadium near Kobe, Japan, Fenway Park in Boston, and Wrigley Field in Chicago). It should be noted that this distinction will disappear after the 2020 NPB baseball season. For the 2021 season, the Swallows move into the new stadium down the street constructed for use in the Olympics.

From the first view, it was clear that this stadium was a classic, a must see for baseball fans. Cozy by MLB standards, the stadium holds 35,000+ fans (and the seats are a tight fit for visitors), but on this night, there were nowhere near that many people in the seats. Just like night games in the US in April, you run the risk of conditions that are not ideal for watching a game. The temperature for the 1800 start was 41 F, under a perfectly clear sky. The Swallows hosted the Yokohoma DeNA BayStars (a team we would see at home later in the week).

For the exchange of the lineup cards, the managers, coaches and umpires were bundled up against the cold. (Photo credit: Jeff Hayes)

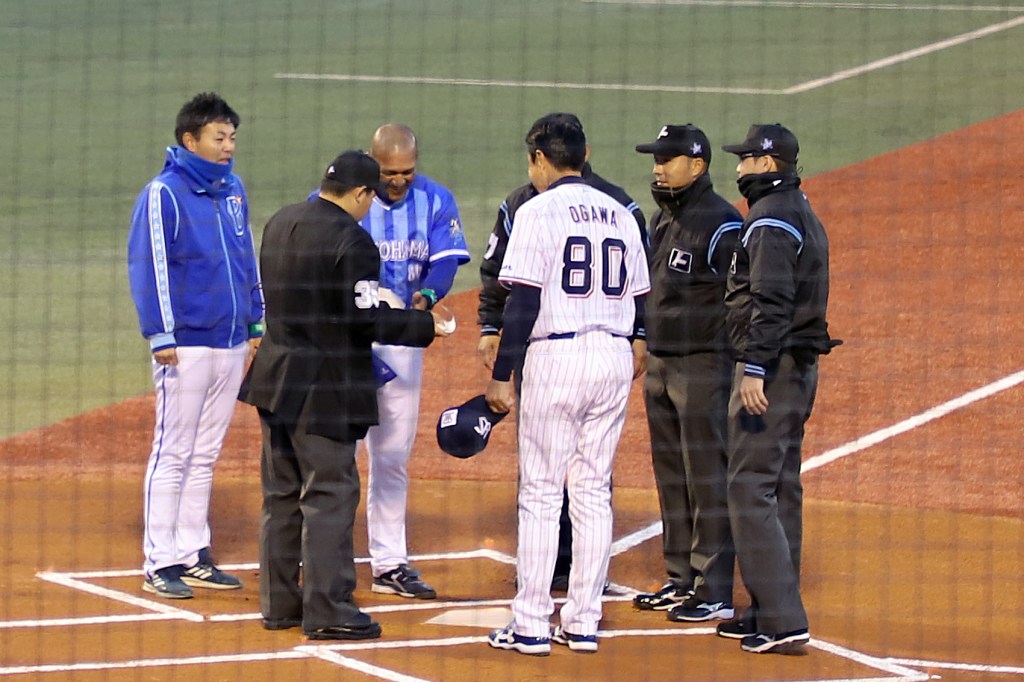
There were some familiar names in the lineup for both teams. For the visiting BayStars, Neftalí Soto was batting second and playing RF. Soto played for the Reds in 2013/2014, and was in the Washington Nationals farm system as recently as 2017 (we saw him play as a member of the Harrisburg Senators).

Wladimir Balentien, the LF for the DeNA BayStars.

The Swallows lineup featured Nori Aoki (who played for the Royals, Giants and Mets in the MLB) batting second and playing CF. In LF was Wladimir Balentien, who played for the Reds and Mariners between 2007 and 2009. The Swallows struck first in bottom of the 1st inning with a single run. The BayStars responded with four runs in the top of the 4th inning, a lead they would protect through the middle innings. The relatively slow pace of the Japanese game, coupled with the very cold temperatures for a baseball game, had this veteran fan ready to call it a night in the 7th inning. My brother convinced me to brave the cold for just a bit longer, though I wasn’t so sure about that decision.

Despite the cold, the BayStars fans filled the left fields stands, the traditional seating for opponet fans at NPB parks. (Photo credit: Jeff Hayes)

The Swallows offense came to life on this cold night in the bottom of the 8th, as a three run homer by RF Yuhei Takai tied the game at 4. After a scoreless top of the 9th, the Swallows scored in the bottom of the 9th to win 5-4. The game clocked in at about three hours, which seems to be about average for an NPB game. The cold made it seem longer, but the Swallows comeback, and the crowd reaction to it, made sitting in the cold worth the effort.

RF Yuhei Takai receiving a Tsubakuro doll (the Swallows mascot) after hitting a three run homer to tie the game. It is customary for players to receive a doll after hitting a home run in Japan. (Photo credit: Jeff Hayes)

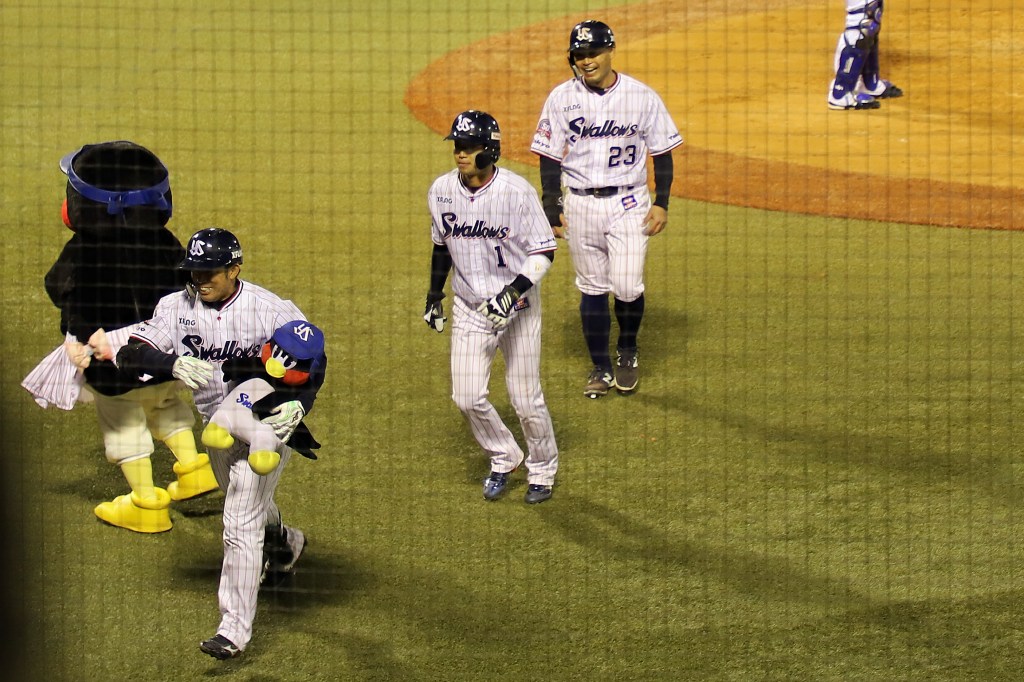
The ending was befitting of the venue. We feel fortunate to have visited Meiji Jingu Stadium, steeped in tradition and NPB history. It will be a sad day when the Swallows move out of this historic and beautiful ballpark for a new home just down the street.

Sendai, Japan Wednesday, April 4th, 2019

1. Getting to Sendai

After seeing a ballgame in Shinjuku Tuesday night, we rose early to take the train from Shinjuku to Tokyo Station to catch the Shinkansen to Sendai for an early afternoon ballgame. Since we were leaving Tokyo for a few days, we checked out of our hotel, taking our luggage with us. Typically, we would not take the train during morning commute in Tokyo (considering the crush of people during this time), but we made a reservation on the Narita Express. This gave us some breathing room while lugging our bags.

JR tickets from Shinjuku to Sendai

Upon arriving at Tokyo Station, we boarded Car 9 (the Green Car) on the 0910 Hayabusa (the Falcon) for Sendai station. During the one hour and 30 minute trip, we were treated to sweeping vistas of the terrain. While a flight would have been shorter, taking the bullet train afforded us a view of Japan that was well worth the extra time.

From the Shinkansen, headed north toward Sendai. Snow capped mountains in the distance reminded us that it was still winter in parts of Japan.

Arriving at Sendai station around 1040, we were too early to check into our hotel (located across the street from the station). However, we planned for this. Within Sendai station were rows and rows of lockers, many large enough to easily hold our bags. Conveniently, we were able to pay with our Suica cards. Luggage secured, we headed out toward the ballpark.

2. Rakuten Seimei Park Miyagi

Initially, we planned to take the subway from the station to the ballpark, a distance of a little more than a kilometer. Confused by which direction was which down in the subway, we abandoned this option, and instead decided to walk. The weather was cloudy and cool, perfect for an early April stroll. The walk also allowed us to take in more of Sendai.

A manhole encountered on the way to the ballpark in Sendai. (Photo credit: Jeff Hayes)

We were far from alone on the walk; it seemed as though much of Sendai was headed to the park for the early afternoon game. Reaching the park well ahead of the start time, we had plenty of time for pictures. Like most Japanese ballparks, there was plenty to do and see outside of the park, with games, food stands and places to purchase team apparel.

There were signs outside the park indicating the stadium was cashless, meaning we needed to buy a card to make purchases within the ballpark. This was something we had not yet seen. Should you plan to catch a game in Sendai, this is something to consider.

Outside of Rakuten Seimei Park, shortly before game time. Like many NPB ballparks, there was plenty to see and do, including live entertainment. (Photo credit: Jeff Hayes).

Our seats were just to the third base side of home plate, at the top of the lower level. These seats allowed for a great view of the field. For the 1300 start, the Sendai Rakuten Golden Eagles hosted the Hokkaido Nippon Ham Fighters. Unlike other parks we’d visited, there was less English here, with just some on the scoreboard and on the field. In a strange sense, it felt like we were really in Japan, as Sendai is NOT an international city (like Tokyo or Osaka).

Rakuten Seimei Park Miyagi was as appealing as expected, in spite of the gray skies. The capacity is small compared to other NPB ballparks, holding less than 25,000 people. Nearly every seat in the park was filled, even with the early afternoon start. It seems that, unlike MLB contests, the start time of the game does not curtail crowd size. Like some MLB parks, it was interesting to note that the home team’s dugout was on the third base side.

Our seats at Rakuten Seimei Park Miyagi. Despite the clouds and cool weather, the park was essentially filled. (Photo credit: Jeff Hayes)

As was the case in other NPB ballparks, we were limited as to how much of the park we could access. This did hinder of our ability to fully explore the stadium, as well as take pictures. However, the view from our park was excellent, with only the far left field corner obscured. After the typical pre game pageantry, the first pitch was thrown precisely at 1300.

The Golden Eagles struck first, scoring three runs in the bottom of the first. Due mainly to his inability to contain the Golden Eagles offense early, the Fighters starting pitcher lasted only 1 2/3 innings. The teams settled into the game by trading scoreless innings through the fifth inning. The Golden Eagles offense erupted once again in the bottom of the sixth, scoring eight runs and putting the game out of reach of the Fighters.

Increasing sunshine provided some relief from the gloom and cool temperatures. The park seemed to come to life as the sun came out.

As the game continued, the clouds slowly dissipated, with sunshine providing some warmth toward the end of the game. The increasing sunshine also lifted the veil over the ballpark, revealing its colors. The Golden Eagles won the ballgame 11-3, with a game time of nearly 3 hours and 40 minutes. Rakuten Seimei Park is a cozy ballpark, barely larger than the biggest MiLB parks in the US. Its size holds a charm not generally not found in MLB parks. If it was not so far away from Tokyo, I would readily visit the park again.

On the way back to the hotel, we discovered the Golden Eagles team store. In the store we found a MUCH larger selection of team apparel than at the ballpark, which allowed my brother to find a Tohuku jersey (a reference to the region of Japan). We noticed many older Golden Eagles fans wearing the same jersey at the game. Following some exploration of nearby Sendai, we had an early dinner, then relaxed after a long day.

Seeing Baseball Games in Japan – Part 3: Going to the games

Going to a baseball game in Japan is much like going to a game in the US. However, being in a place where we could not speak or read the language did pose some issues not experienced here. Below are a few of the things we learned going to Japanese baseball games.


1. Getting to the ballpark

While the specific directions of how to get to the park are contained in the review of each park, there are a few common themes. First, review the route to the game, including the specific train lines that get you to the park. Sounds simple, but planning could save you some stress later on. Plan to leave early, in the event you miss your train. Many Japanese ball parks open two hours early, and have things to do and see around the park itself.

Baseball parks in Japan are located close to train stations (we’ve noticed very little in the way of parking for cars at the games). We’ve found that most are within walking distance (generally a kilometer or less). If that distance seems excessive, you can probably get a taxi to the game and back.


2. Entering the ballpark

After you arrive, survey the landscape to identify your gate for entry. The tickets we’ve had vary with respect to readability. Some are fairly easy to decipher

Ticket from the TokyoDome, September 22, 2018

The above ticket was for a Giants game against the Tokyo Yakult Swallows at the TokyoDome on September 22nd, 2018. Note that much of the vital information (gate, row, seat) have English next to them, making navigation fairly easy.

Ticket for Miyagi Park in Sendai, Japan, Thursday, April 4, 2019

However, most of the tickets we received looked more like the ticket above. The gate number, row and seat are decipherable, but not easily as the ticket for Tokyo. If you are unsure which gate to enter, simply ask. In the case of the above. I handed the ticket to a security guard, who pointed me to the correct gate. Once inside, keep handing your ticket to staff members until they bring you to your seat. (FYI; there is no tipping in Japan)

Unlike American ballparks, the Japanese stadium setup usually restricts you to the section in which your seat is located (with the TokyoDome being an exception). This hampered our ability to get as many pictures as we would have liked.


3. Food

One of the major differences between American and Japanese ballparks is the cuisine. As you might expect, the menu is dominated by Japanese fare (though some parks did offer hot dogs). My palate is not very sophisticated or varied, so I shied always from much of what was available. However, bento boxes were popular, containing vegetables, rice and fish.

Ordering can be a challenge, given the language barrier. In Tokyo, there was enough recognition of English to allow for rudimentary conversations regarding ordering food. Elsewhere, we’ve seen most ballparks offer a picture book of the selections. Often pointing to the book and indicating the desired quantity with fingers accomplished the task. The vendors are typically very helpful, and I didn’t face a situation where I couldn’t get what I wanted from the concession stand.

Drinks can also be obtained at the concession stand. We discovered there is no diet soda (as we know it) in Japan, but zero calorie soda is available. We mostly drank water, which is a must when traveling through Japan in the warm season.

We didn’t see too many vendors selling food in the crowd, but there were people delivering drinks. Dubbed beer girls, there were dozens of young women hawking alcohol, wearing brightly colored shirts and carrying packs on their backs.


4. Souvenirs

Like ballparks in America, each of the ballparks we visited had a team store. Most of the team stores had a selection of apparel you might find in a team store in the US, as well as programs, yearbooks and baseball cards. In addition, the stores had items that appeared to be more popular in Japan than back home. These items included pom poms, dolls and noise makers shaped like cones (which the crowds put to good use during the games).

DeNA BayStars team store in Yokohama Stadium. (Photo credit; Jeff Hayes)

However, for the avid baseball fan, the team stores often seemed to lack a greater variety of hats, jerseys and pictures. My brother Jeff found that larger teams stores were often found outside of the ballparks. For example, there are two team stores in Sapporo (home of the the Hokkaido Nippon Ham Fighters). The team store for the Sendai Rakuten Golden Eagles is down the road from their ballpark, and the team store for the Seibu Lions is on the 8th floor of the Seibu Store in the Ikebukuro section of Tokyo. If you seek a larger selection of team items, especially hats and jersey, you should Google the location of the official team stores.

Seeing Baseball Games in Japan – Part 2: Traveling in Japan

In the previous post, we covered some of the aspects of planning the trip we felt were important to prepare you for the journey. In this post, we will review some of the things we discovered about traveling while you are in Japan. Hopefully these tips can make your travels easier.


1. Getting to where you are staying from the airport

If you arrive at Narita Airport (where most international flights arrive), the best place to get to where you are staying is the Narita Express. This limited express train gets you from Narita to Tokyo area locations. You can make reservations online, which is remitted at Narita, or you can make the reservation once you arrive in Japan.

We recommend Googling the station nearest your hotel, and determining the distance between the two. If you are unsure of how to get to the hotel from the train station, we recommend taking a taxi. Tell the driver the name of your hotel, and they will know how to get there. The taxi stands are clearly marked, though it is possible that some cabbies may shy away from transporting foreigners (try not to take it personally). Taking a taxi after a long flight might be the easiest way to conclude your travel day.


2. Using Mobile Devices in Japan

During our previous two trips to Japan, we simply used our phones with an international data plan from Verizon. The plan, for $10 USD a day, we made calls, texted and surfed the Web, using Verizon partner networks. Each day we used data on our phones, we were charged the $10; if we didn’t, we were not charged. Our 8 day stays therefore cost $80 for data, text and call. In most places, the cell coverage was sufficient to meet our needs. However, there were times when the drop off in coverage caused some issues using a Google Maps while using the Tokyo area trains.

In preparation for our upcoming return to Japan, I have been researching alternatives. Using a SIM card with my locked iPhone appears to be more of a hassle than it’s worth, but others have been ingenious to work with the iPhone to get the SIM cards to work.

The other alternative seems more attractive: a portable WiFi router. Research points to the same provider as being the best in Japan: Japan Wireless. For our 8 day visit, the cost would be about $60 USD. When we experiment with this option during our next rip, we will provide more information.


3. Using Tokyo area trains

If you plan to use train services in the city in which you’re staying, get a Suica card. The card can be obtained at any JR East station, and can be used on JR East trains, subways and buses, as well as some vending machines and taxis. We found the card to be invaluable when navigating the subway. On our first trip to Tokyo, we used tickets obtained at a kiosk. This approach meant accurately determining your destination beforehand, and tabulating the cost before getting the tickets. This approach proved cumbersome, and my brother’s research provided a better alternative.

The Suica card can be purchased at any JR Rail or local/regional train station, at the black kiosks, which have English buttons. You can preload any amount up to 10,000 yen (which is roughly $100 USD), and you are ready to go. The Suica card can be used at any turnstile labeled with IC, even if it is Passmo or other service is in the area, as well as any Tokyo Metro train. Just swipe the card as you enter the station, and swipe out as you exit (much like metro areas in the US). The card doesn’t expire, and you can reload the card at the train station as well.

Make sure you have Google Maps on your phone before you get to Japan. We discovered that this app provides incredibly detailed information about train service. For example, after choosing your starting point and destination, selecting the train option tells you which train to catch, on which platform and when the next train arrives

Type in your starting point (if it’s not your current location) and your destination. Google Maps will offer a few ways to get there.
After choosing one of the routes, Google Maps provides very detailed instructions for getting to your destination.

It might save you some time and stress if you review your route choices in Google Maps BEFORE you travel. Japanese trains stations can be difficult to navigate, even for locals. Leave yourself some time to acquaint yourself with the station, and don’t be surprised if you experience some frustration trying to navigate the station. Don’t worry too much; you’ll figure it out.

Finally, it is worth noting (for people who have difficulty getting around) that there are not many places to sit in Japanese train stations. Fortunately, there are usually escalators within the stations, but you can still expect to have to climb stairs in Japan.


4. Using the Bullet Train (Shinkansen)

If you have not done so , you want to plan your travels on the Shinkansen. Japan Rail (JR) operates bullet trains on JR East and JR Central, the lines you are mostly like to use. As mentioned earlier, there are two good sites to use when planning your travels (for travel from Tokyo and east, for travel from Tokyo and west).

Map of the Japan Rail bullet train routes

To begin your journey on the bullet train, take your JapanRail pass and make a reservation at the nearest JR Rail Ticket Office (or Travel Service Center). Tell the representative the your destination and preferred travel time, and you will be issued a ticket for a reserved seat. For a Green Card holders, your reservation will be in a first class car, which are typically less crowded and quieter (which, for me, was worth the upgrade). Making a reservation guarantees you seat; otherwise, you may not get a seat on the train car you wish.

Check the information boards for your track (if the representative does not tell you). From what I’ve seen, all of the train information is displayed in Japanese AND English. Head to the gate, and once you arrive, keep to the right of the turnstiles. Show your JapanRail Pass to the JR representative, who will wave you through. At the gate, you will see lines on the floor, showing you where to stand for entry into your car number (listed on the ticket). If you have a Green Card, there is a good chance you will need to look for Car 8.

Once aboard, find your seat. If you are carrying luggage, be aware that you can carry 2 pieces of baggage on JR trains. The total of height+width+depth of each item must be under 250 cm and the weight less than 30 kg per bag. This is because there is limited overhead storage space in the cars. Starting in May 2020, if you have oversized luggage, you must make a reservation for a seat with oversized storage (which is free)

The Japanese are immensely proud of their train system, and it shows. People from around the world come to Japan just to ride the bullet train. The accommodations are comfortable, and the ride smooth and quiet. Most cars have power outlets for charging devices, and some of the trains offer drinks and snacks. Phone conversations are discouraged; if you need to make a call, head to the vestibule.

Service announcements aboard the train are in Japanese and English, as is the signage. Announcements concerning the next stop occur well ahead of time. Timeliness is a staple of the bullet train, and each announcement ask you to be prepared to exit the car BEFORE the train reaches the station.


Task list

1. Look for the Narita Express once you land in Japan. You might want to check out the website to find the stop closest to where you are staying beforehand.

2. Determine how to use your phone to communicate in Japan. We used our Verizon iPhones with the International plan, but obtaining a WiFi router may be a cheaper and better alternative.

3. Get a Suica card as soon as possible. It helps traveling on Tokyo area travels better. Also use Google Maps to make navigating the train routes much easier.

Seeing Baseball Games in Japan – Part 1: Before you leave for Japan

You want to see baseball games in Japan? Having been there twice (with another trip scheduled for May 2020), I would say GO! While baseball is baseball, regardless of where it’s played, the Japanese passion for the game alone is worth the visit. A Japanese baseball is more like a college football game in the US, or a European soccer match. If you want a taste of what a Japanese game is like, check this out.

There are companies that specialize in Japanese baseball tours, such JapanBall Baseball Tours. The tours provide chaperones who know Japan, and provide tickets and activities while you are there. If you are not comfortable traveling through a foreign country unescorted, this choice is probably for you. However, if you are a bit more adventurous, it IS possible to travel in a Japan to see the games without engaging the services of a tour group. My brother and I have done it twice, having never been overseas before.

The most important part of the trip is planning. Due to my brother Jeff’s careful and extensive research, we have some tips for putting together a baseball trip to Japan, including how to get tickets to games, getting around Japan using the amazing train system, as well as some insight about what we’ve learned about Japanese culture. Of course, the list we provide is by no means comprehensive, nor is it offered as such. Instead, it is a list of things we’ve learned that could help you to plan a trip to see Japanese baseball in person.


1. Check the Nippon Professional Baseball schedule to start planning your trip.

The definitive source for the schedule of Japanese baseball games is here. Of course, this site is in Japanese, but any modern browser should be able to translate the schedule competently. When viewing the schedule, it is important to note that the home team is on the left side under the Match Card header. To learn more about the teams and the cities they call home, check out the NPB home page.

Another good source for the NPB schedule is JapanBall Baseball Tours. That site breaks down the schedule to make it much easier to understand. The schedule there is colored coded, with additional information about the teams and their home cities.


2. Get your baseball tickets BEFORE you leave for Japan

Baseball is exceedingly popular in Japan, and all teams draw very well (the notable exception being the Orix Buffaloes in Osaka). While it is possible to get tickets from either box office at each park, or from ticket kiosks at 7-11 stores, that might end up being a disappointing strategy. For example, the Hiroshima Carp frequently sell out for the season long before the first pitch on Opening Day.

Attempting to get game tickets from the team website can be tricky. My brother used this site to follow step-by-step instructions to by tickets for the Hanshin Tigers. Purchasing tickets for the Tokyo Giants was fairly simple here. For other teams, the process of buying tickets can be daunting, if not impossible if you don’t read Japanese.

In order to avoid the disappointment, I’d suggest getting the tickets through a ticket broker. Be careful when choosing a vendor for the tickets. I had a VERY frustrating experience with Viagogo while trying to secure tickets for a game in Hiroshima. There are a few others that I have not tried, and cannot impart any intelligent review of their services.

Though it may sound biased (since I’ve mentioned this company twice so far), we have had a very good experience using japanballtickets.com. Using this website, we were able to select the numbers of tickets we needed (though we were not able to select our exact seats, as you can in the US) for each game we wanted to attend. We were quoted prices for the seats, and even received rebates when the tickets were obtained for less than the quoted price! For more information on tickets and pricing, check out the site above.

When ordering the tickets, you are prompted for an address in Japan to which the tickets will be delivered. You don’t need to do this immediately; when we purchased the tickets, we did not yet know where we would be staying in Japan. Once you know what hotel you will use, you can provide that information to them. The tickets for all of our games were delivered to the hotel in which we stayed the first night. We were VERY pleased with their services, and plan to use them again this year.


3. Traveling while you are in Japan

Early in our planning to visit Japan, we ruled out driving. Driving through busy streets on the left side of the road while trying to read road signs in Japanese was not my idea of a vacation. My brother Jeff did extensive research about traveling in Japan, and decided the train system was the way to go. Part of that system is the bulletin train, or Shinkansen. Japan offers a significant discounts for visitors, much less than Japanese nationals would pay. You can buy 7, 14 and 21 days passes, depending on the length of your stay.

You can read about the JapanRail (JR) passes here. We recommend obtaining the Green Pass. This option allows you to make reservations for the bullet train, assuring your seats will be available for your excursions. While the prices may seem steep, this service is HIGHLY recommended. Just two trips on the bullet train pays for the pass, and we’ve traveled from Hokkaido in the north to Hiroshima in the south on the bullet train.

If you plans in Japan are firm, you might want to map out your travel on the Shinkansen BEFORE you leave. Since we knew the cities we would visit to see the games, my brother visited the JR sites (For trips from Tokyo and west, for trips from Tokyo and east) to plan the route we would take. He then used the information to make reservations for all of our travels within Japan on the bullet train at once.

There are a couple of things to know about the JapanRail pass. When you purchase the pass online (which you should do no more than 60 days before you arrive, but leave enough time to receive the information at home before you leave), you will receive an Exchange Order. The Exchange Order is the redeemed for the rail pass once in Japan. You can obtain the pass at any JR Exchange Office. You may want to Google the location of the JR Exchange office nearest to where you are staying; it may not be coincident with the nearest JR Office. We discovered this staying in Shinjuku. The processes takes about 20 minutes, at which time you can make reservations on the bullet trains during your stay.


4. Using money in Japan

Despite being a nation on the cutting edge of technology, Japan is still a largely cash society. More places are accepting credit cards, though these places may NOT accept foreign credit cards (we experienced ourselves at the Buffaloes team store in Osaka). You can check with your credit card company to see if their services are accepted in Japan.

In any event, we would recommend taking some Japanese currency (called yen) with you. You can get some yen from your bank before you go. The cash could help with purchasing train tickets from the airport to the city in which you are staying, for example. Once you arrive, you can obtain local currency at an ATM at any 7-11 store or Japanese post office (remember your card company will charge a fee for foreign transactions).


Task list

1. Check the NPB site or Japan Ball Travels for the NPB schedule to choose dates for your games.

2. Get you baseball tickets before heading to Japan. We recommend using Japan Ball Tickets to get your tickets.

3. Obtain your JR RailPass no more than 90 days before you plan to use it in Japan.

4. Get some yen for your trip. Check with your bank for more details.